The goal: build a tenon and mortising jig for the accurate joining of ukulele necks and bodies.
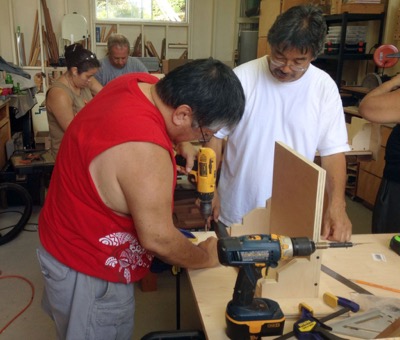
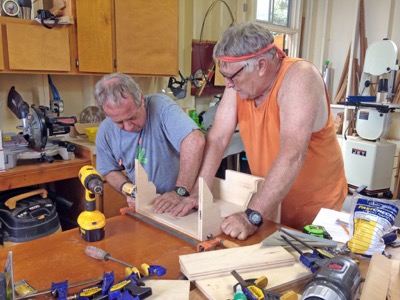
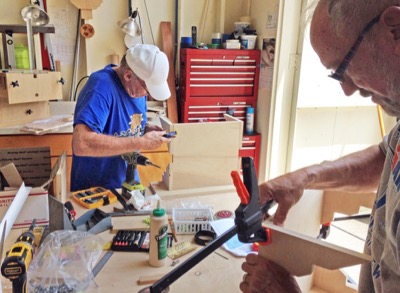
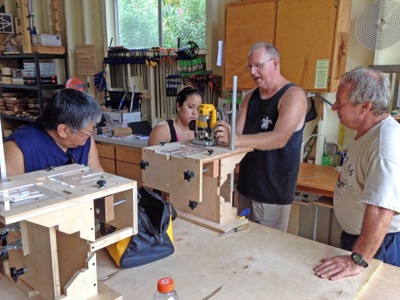
Ten builders assembled recently for the most complicated workshop I ever hosted. The one-day event at my Kona workshop became two days, but all builders bravely soldiered on, created buddy systems, glued and screwed, drilled and routed, clamped and hammered.
Finally, the collaborative enterprise was finished and each participant completed a good-looking jig. Congratulations to everyone involved!
The jig is a modified version from Robert O’Brien Mortise/Tenon Jig. If you are interested in these modifications that work in concert with Robert O’Brien’s plans, jump to the “How-To Build It” section below. You may also purchase Robert O’Brien’s plans on his website and modify yourself!

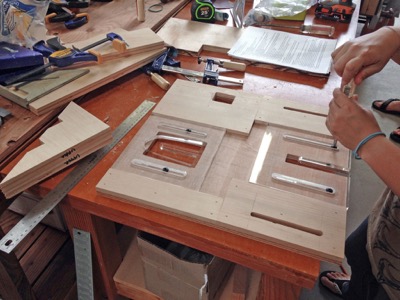


Jig in the Wild – Neck Side

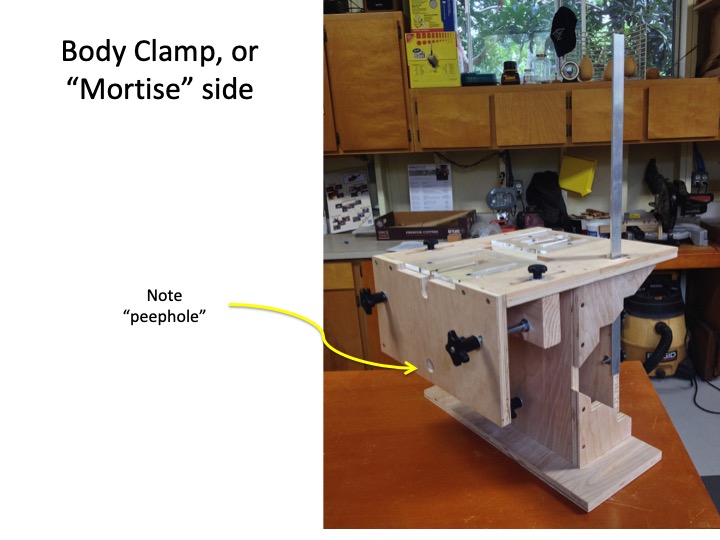
Jig in the Wild – Body Side

Ukulele Mortise & Tenon Build Information
The neck mortise/tenon jig for ukulele is a modified version of Robert O’Brien’s Mortise & Tenon for Guitar Jig plans. You can find his videos on how to build one on YouTube. He also has a “how to use” video. O’Brien’s plans are available on his website although you may be able to build one just from the videos. I encourage you to purchase his plans, though, to support his efforts and to make the build process easier.
My goal was to come up with a version that could address any ukulele size from soprano to baritone as well as a thin-bodied traveling uke. The only mods necessary to adapt O’Brien’s jig to the smaller depth of an ukulele are:
- Increase the distance of the Pivot Board from the Vertical Board, by increasing the width of the Pivot Board Spacer, to 4”
- A guitar tenon can be quite long. If you’re making a soprano or a traveling uke, the tenon may only be 1 inch…maybe less! Increasing the size of the Pivot Board Spacer allows any tenon size up from very small to 3” thus addressing the depth differences of ukuleles.
- New Template – Custom templates to address the needs of Soprano to Baritone Ukuleles as well as Traveling Ukes.
- Narrowed tenon and mortise to about 0.5 inches because of the thinner profile of an ukulele neck heel.
- Changed profile of the tenon template opening
- If you make you own template, don’t forget to add or subtract the distance of the router bit to the OD of your bushing!
This will make sense after you review the video and review O’Brien’s plans.
Other optional mods to aid build or stability:
- Increase the thickness of the template to 3/8” acrylic vs the 1/4” MDF called out on Robert’s plans for added stiffness
- Requires a mod to the build of the jig top
- Add a “peephole” in Body Brace Board to assist alignment
- Add a Body Brace Board “stability bar” to aid, well, stability.
- “Stair-step” the top braces to make clamping/building the jig easier
- Added cork linings to the body brace and body board.
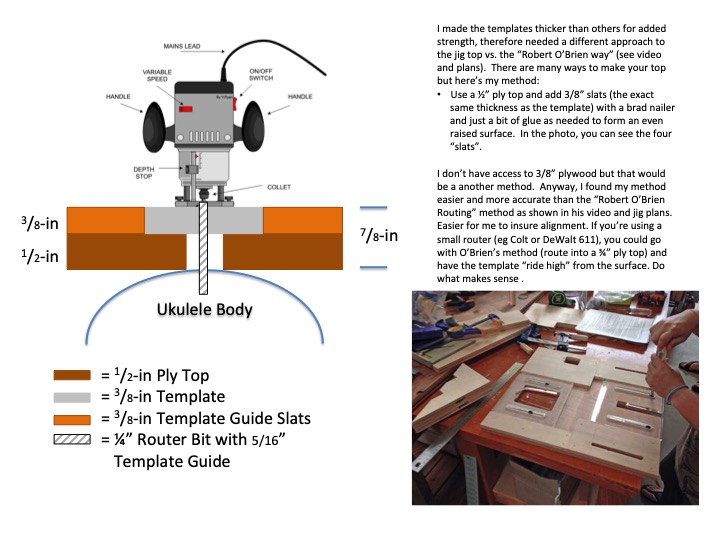
If making templates 3/8″ thick:
- The thicker templates required a mod to the top. Robert routes his top template slots (1/4” deep into 3/4” ply). I use 1/2” ply and add 3/8” slats to form template slots. I found this approach easier/more accurate. Up to you
- Altered the top to support the 3/8” thick templates. I used whatever wood I had for “slats” using the drum sander to match template thickness (OPTIONAL – only if modifying the templates or purchasing my templates)
- MY GUESS, is you could stay with a single sheet of ¾” ply routed ¼” deep to support the templates. The templates would “ride high” which isn’t an issue if using a laminate trimmer like the Bosch Colt (“ok”) or the DeWalt 611 Compact Router (my fav). Template size from his plans are big and the risk of the router tipping over the edge is virtually nil.
- If you use a “full size router”, probably a good idea to have the templates flush with the top so you don’t tilt the router while making the tenon/mortise
- In either case, use of a plunger router base is really the best way to go.
- Altered the top to support the 3/8” thick templates. I used whatever wood I had for “slats” using the drum sander to match template thickness (OPTIONAL – only if modifying the templates or purchasing my templates)
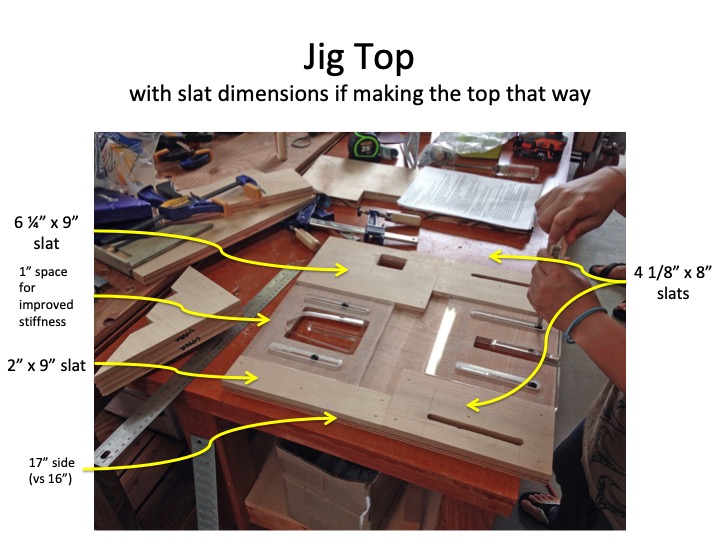
- Increased the size of the top by an inch to make it 16″ x 17″.
- My choice just for better stability. You could easily stay with 16”.
- The tenon passage in the top is 1” from the front edge; a bit different from O’Brien’s plan.
To be clear, these are not the definitive changes to make the jig for ukuleles, just an approach that works for me.
One build note…The top of the ukulele needs to be flat which is stressed in O’Brien’s video. The pluses are significant. You’ll always have a perfectly aligned neck and you can compensate for a less-than-perfect body build, for example if the soundboard-to-sides are not a perfect 90 degrees (I know…never happens). It’s also easy to dial in back angle if you wish.
Since I made this mod, there are been many dozens who have made this modified jig with apparent success.
Due to the high cost of shipping, I am no longer able to make these templates at an acceptable price. Please contact me if interested.
LMI has come out with a finished version of Robert’s jig that looks real nice…but I’ve been told that the changes made from his original plans don’t mate with the changes I made for an ukulele.
Tenon Laser-Cut
Ukulele Template

Mortise & Tenon Templates available.
Contact me for info.
Build Info Slides

Click to enlarge